
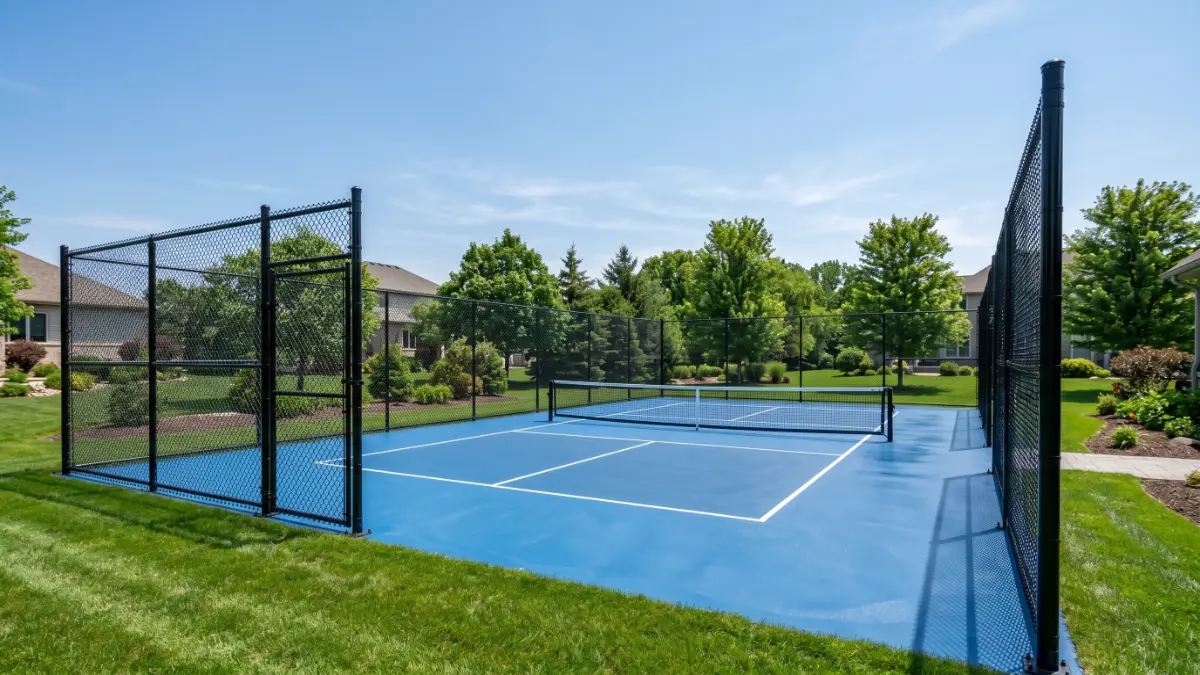

Introduction
The first court I ever tried to build was in my own backyard. I had watched a few YouTube videos, rented a compactor, and convinced myself it would be a weekend project. By Sunday evening, I had a crooked slab, a low spot that collected every drop of rain, and lines that looked like they’d been painted by someone who’d never held a brush. I played exactly three games on that court before a freeze‑thaw cycle cracked it in half. That failure cost me $8,000 and a full year of waiting before I could afford to tear it out and start over. If you’ve ever lain awake at night worrying that your pickleball court construction project will turn into a money pit — or if you’ve stared at a contractor’s quote and had no idea whether it was fair — I wrote this guide from the scar tissue of that mistake.
I’m a certified USA Pickleball referee who has since helped plan and inspect over two dozen courts for homeowners, HOAs, and community centers. I’ve stood on slabs that were poured too thin, tested surfaces that peeled after one summer, and fired contractors who cut corners I didn’t know to look for the first time around. This article is not theory. It’s the step‑by‑step, hard‑won blueprint I wish someone had handed me before I broke ground — the same pickleball court construction advice I now give to every player who asks, “How do I build a court that actually lasts?”
Pickleball Court Construction Overview
Building a pickleball court means creating a flat, durable playing surface with correct dimensions, proper drainage, safe surroundings, and clear markings. You can hire a professional contractor or do much of the work yourself. Either way, the process follows the same sequence: planning, site preparation, base, surface, nets, fencing, and lighting. Each layer must be done right, or the court won’t last. For official specifications, refer to the USA Pickleball court construction guidelines. If you’re still deciding between building or finding an existing court, start with our ultimate guide to pickleball courts.
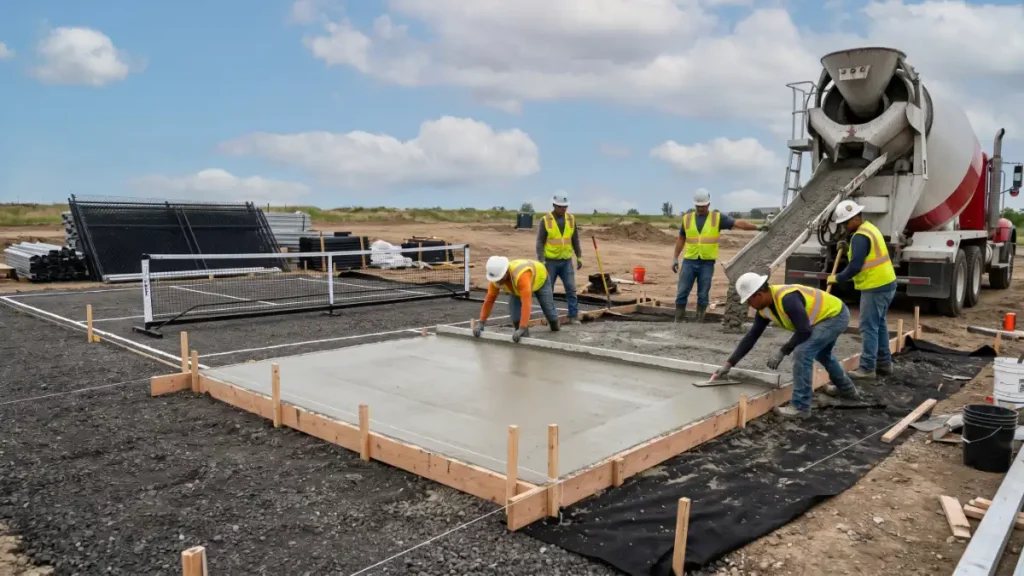
Planning Your Pickleball Court Construction
Before you break ground, answer these questions:
- Where will the court go?
- Do you need a permit?
- Will you use concrete, asphalt, or modular tiles?
- Do you want lights?
- What’s your total budget?
Write down your answers. In fact, A clear plan saves money and prevents costly mistakes.
Site Selection & Permits
Pick a flat area with good sun exposure and natural drainage. Stay away from large trees whose roots can crack the base. First of all, Call 811 before you dig to mark underground utilities.
Most towns require a building permit for a permanent pickleball court. Check with your local building department. You may need a site plan showing the court location, setbacks from property lines, and drainage details. If you live in an HOA, get written approval first. Ignoring permits can lead to fines or being forced to remove the court. Smart pickleball court construction starts with a well‑chosen site and all the necessary paperwork.
Court Dimensions
A regulation pickleball court is 20 feet wide and 44 feet long. But you need more space than that. Always plan for safety clearances: A regulation pickleball court is 20 feet wide and 44 feet long. But you need more space than that. For more details on court layouts, check out our pickleball courts guide.
- Minimum playing area: 30 feet wide by 60 feet long.
- Ideal: 34 feet wide by 64 feet long for comfortable tournament play.
The kitchen is 7 feet deep from the net on each side. The net is 36 inches high at the posts and 34 inches at the center. All lines are 2 inches wide. If you’re converting a tennis court, check out our pickleball net vs tennis court comparison. Accurate measurements are the backbone of pickleball court construction, so keep these numbers handy – they guide every measurement you’ll make.
Pickleball Court Construction Base Preparation
The base is the most important part of any pickleball court. A bad base means cracks, sinking, and water pooling.
Step‑by‑step site prep:
- Remove grass, rocks, and topsoil down to firm soil.
- Grade the area with a slight slope (0.5% – 1%) to let water run off.
- Compact the soil with a plate compactor or roller.
- Install a geotextile fabric over the soil to prevent weed growth and stabilize the base.
For drainage, consider a French drain or gravel trench along the lower side if water collects after heavy rain.
Base options:
- Concrete slab: 4 inches thick (5 inches in freeze‑thaw climates), reinforced with wire mesh or rebar. Long‑lasting, but needs expansion joints.
- Asphalt: 3–4 inches over a compacted stone base. Softer on joints, but may require more maintenance.
- Compacted gravel + modular tiles: Fast installation, excellent drainage, good for DIY. For indoor court options, see our indoor pickleball court guide.
Therefore, a solid base is the most critical step in pickleball court construction, so never rush through it.
A quick comparison:
| Base Type | Durability | Joint Impact | Cost | DIY Friendly |
|---|---|---|---|---|
| Concrete | Highest | Higher | $$$ | Moderate |
| Asphalt | High | Lower | $$$ | Low (pro needed) |
| Gravel + Tiles | Medium | Lowest | $$ | High |
Pickleball Court Construction Drainage
Water is a pickleball court’s worst enemy. Even a small puddle can make the court unplayable.
- Slope the entire base in one direction (0.5‑1% cross‑slope) so water runs off the court surface.
- Install a perimeter French drain if the area is wet.
- Modular tiles naturally drain through the surface, making them the easiest solution.
Likewise, if you pour concrete, make sure the finished surface slopes correctly. Standing water leads to cracks and algae. Proper drainage is non‑negotiable in any pickleball court construction project.
Pickleball Court Construction Surfacing & Coatings
Once the base is done, apply a playing surface.
- Acrylic coating (over asphalt/concrete): The gold standard. Multiple layers provide color, texture, and durability. For indoor surfaces, check out our indoor court surfacing options guide.
- Modular sport tiles: Interlocking plastic tiles that snap together. Great for DIY, excellent drainage, and good traction.
- Poured‑in‑place rubber: Soft and safe, but expensive and less common.
In most cases, for most permanent backyard courts, acrylic coating on concrete offers the best balance of performance, longevity, and appearance. Choosing the right surface is a major decision in pickleball court construction.
Customizable Design Options
A pickleball court doesn’t have to be plain green or blue. Modern surfacing systems let you customize the look and feel.
- Color combinations: Choose different colors for the court surface, kitchen zone, and outside borders. Popular combinations include blue/green with a contrasting kitchen, or a neutral grey with bright accents.
- Logos & graphics: Many facilities add a center logo, club name, or sponsor decals embedded into the acrylic surface. These are applied between coating layers so they won’t peel.
- Multi‑sport lines: If you want to share the space, additional lines for basketball or badminton can be painted in a different, lighter color. This keeps the court functional without confusing players. For tennis court conversions, read our tennis court to pickleball conversion guide.
- Border & safety zones: Add a 3‑5 foot colored border around the court perimeter for a clean, professional look and extra safety run‑off.
Work with your contractor or surfacing supplier to see color samples and design mockups before the final application. Furthermore, a custom look can make your court the centerpiece of the neighborhood.
How to Mark Pickleball Court Lines (Permanent)
Lines must be 2 inches wide, white or contrasting color, and completely straight.
Permanent marking options:
- Inlaid tape: Embed athletic tape into the final acrylic coat for a seamless finish.
- Cold paint: Apply with a stencil. Touch up every 1–2 years.
- Acrylic resurfacer with color: Paint lines on a separate topcoat.
Always measure from the center of the court outward. Double‑check the kitchen depth (7 feet) and the distance from the net (22 feet to each baseline). Permanent, straight lines finish off a successful pickleball court construction.
Pickleball Court Construction Net Posts
Permanent posts look professional and never need adjusting.
- Set posts in concrete footers at least 24 inches deep.
- Space them exactly 22 feet from the center of the court (net center).
- Posts should be 36 inches tall above the surface, with a crank or ratchet to tighten the net cable.
If you prefer flexibility, a heavy‑duty portable net works on any surface. Sturdy net posts are a small but vital part of pickleball court construction.
Pickleball Court Construction Fencing
Fencing keeps balls inside the court and adds privacy.
- Height: 10‑feet high is standard for pickleball, especially if multiple courts are side‑by‑side.
- Material: Galvanized chain‑link with vinyl coating lasts decades.
- Gates: Install a double‑wide gate for equipment access.
- Windscreens: Fabric panels reduce wind and provide a clean backdrop.
Add benches, shade structures, and a water station for a complete experience. Good fencing secures your pickleball court construction investment, so plan it at the same time as the base.
Pickleball Court Construction Lighting
If you want night play, plan lights early.
- LED floodlights mounted on 18–24 foot poles. Place poles outside the fencing to avoid glare. For indoor court lighting requirements, see our indoor pickleball court lighting guide.
- Place poles outside the fencing to avoid glare.
- Aim fixtures to overlap light evenly, avoiding dark spots and shadows.
- Electrical work must be done by a licensed professional and may require a separate permit.
Typical cost: $3,000 – $10,000 depending on the number of fixtures and pole installation. In addition, lighting extends playtime and is a worthy addition to your pickleball court construction.
Pickleball Court Construction: DIY vs. Professional Installation
You can handle site prep, tile installation, and even painting if you’re comfortable with tools. But for concrete pouring, electrical work, and permanent fencing, hiring pros saves time and ensures quality. Weigh your skills carefully before taking on a pickleball court construction yourself.
Decision matrix:
| Task | DIY Possible? | Pro Recommended? |
|---|---|---|
| Site clearing & grading | Yes | For large areas |
| Concrete pouring | No | Yes |
| Modular tile installation | Yes | Not needed |
| Acrylic coating | Yes | Yes for best finish |
| Fencing | Yes | Yes for large runs |
| Lighting | No | Yes |
How to Choose a Pickleball Court Contractor
If you hire a professional, picking the right contractor makes all the difference. Look for these qualifications before you sign a contract.
- Pickleball‑specific experience: Ask to see photos of completed pickleball courts, not just tennis or basketball.
- References: Call previous clients and visit a finished court in person if possible.
- Licensed & insured: Verify their license and ask for proof of liability insurance.
- Detailed written estimate: The quote should break down every cost component, not just a total number.
- Timeline guarantee: Get start and completion dates in writing.
- Warranty: Ask what they cover—surface, base, fencing, and for how long.
Always get at least three bids and don’t automatically pick the lowest one. As a result, a poorly built base will cost far more to fix than a good one costs to install. The right contractor makes all the difference in pickleball court construction.
Pickleball Court Construction Cost Breakdown
Here’s what you can expect to spend on a single permanent court (professional installation):
| Component | Estimated Cost |
|---|---|
| Site prep & grading | $1,000 – $5,000 |
| Concrete slab (4″) | $5,000 – $12,000 |
| Acrylic surfacing | $3,000 – $8,000 |
| Net posts & system | $500 – $1,500 |
| Fencing | $3,000 – $10,000 |
| LED lighting | $3,000 – $10,000 |
| Permits & design | $500 – $2,000 |
| Total | $15,000 – $50,000+ |
A DIY modular‑tile court over a gravel base can be built for as little as $5,000 – $8,000. Therefore, even a budget pickleball court construction is within reach if you do some of the work yourself.
How Long Does Construction Take?
A typical timeline for a professionally installed court:
| Phase | Time |
|---|---|
| Permitting & design | 2–6 weeks |
| Site prep & base | 1–2 weeks |
| Concrete curing | 28 days (minimum) |
| Surfacing & lines | 1 week |
| Fencing & lights | 1–2 weeks |
| Total | 8–12 weeks |
Modular tile courts can be ready in a single weekend.
Pickleball Court Construction Maintenance
Once your court is built, a little care keeps it perfect.
- Curing: Let concrete cure fully before playing (28 days).
- Weekly: Sweep off leaves and dirt.
- Monthly: Check for cracks or standing water.
- Yearly: Resurface or repaint lines as needed.
- Winter: Remove snow with a plastic shovel, never metal.
Ongoing care protects your pickleball court construction for years to come.
Pickleball Court Construction Final Inspection
Before you play your first game, do a full walkthrough with your contractor (or by yourself if you built it).
- Measure everything: Court length (44 ft), width (20 ft), kitchen depth (7 ft), net height (34″ center / 36″ posts).
- Check slope: Pour a bucket of water on the court surface. It should run off smoothly with no puddles.
- Inspect lines: Are they straight, 2 inches wide, and evenly painted? Check for wavy edges.
- Test the net: Crank should work smoothly, cable should be tight, posts should be plumb.
- Fencing & gates: Walk the perimeter. Gates should latch securely from both sides.
- Lighting: Turn lights on at dusk. Walk the court and look for dark spots or glare from any position.
- Surface texture: The court should feel grippy but not rough. Run your hand over it; it should feel like fine sandpaper.
Make a punch list of anything that isn’t right and don’t make the final payment until every item is fixed. Finally, a detailed final walkthrough is the last step in a successful pickleball court construction.
⚠️ Top 5 Pickleball Court Construction Mistakes (and How to Avoid Them)
I’ve walked onto too many new courts that already had problems. These are the most common — and completely avoidable — errors I see, along with how to get them right the first time.
| Mistake | Why It Happens | How to Avoid It |
|---|---|---|
| 1. Pouring concrete without proper slope | Contractor treats it like a patio and makes it dead flat. | Specify a 0.5‑1% cross‑slope in the contract. After pouring, check with a laser level or bucket test before it cures. |
| 2. Skipping geotextile fabric | To save a few hundred dollars. | Always install a geotextile fabric over compacted soil. It prevents weeds, stabilises the base, and extends the court’s life by years. |
| 3. Not letting concrete cure fully | Eagerness to play. | Wait a full 28 days for curing. Playing too soon can crack the slab and ruin the surface. Mark the date on a calendar and stay off. |
| 4. Using the wrong paint for lines | Grabbing cheap spray paint or regular latex. | Use only acrylic athletic court paint or inlaid tape. Cheap paint fades fast, peels, and becomes slippery when wet. Buy the right product once. |
| 5. Hiring a contractor with no pickleball experience | Choosing the lowest bid. | Ask specifically for photos of pickleball courts they’ve built. Check references. A tennis‑court builder may not understand kitchen lines, net height, or slope requirements. |
Meanwhile, try the interactive planner below.
Interactive Construction Planner (Tool)
I’ve built a simple interactive planner on PickleInsights where you can click through the construction steps, select your materials, and see an estimated cost range. Try it below.
🏗️ Interactive Construction Planner
Select your options below to see an estimated cost range.
1️⃣ Choose Your Base
2️⃣ Choose Your Surface
3️⃣ Add‑Ons
Download Your Free Construction Checklist & Plan
I created a one‑page PDF that includes a step‑by‑step construction checklist, a court dimension diagram, a base & surface comparison table, and a material shopping list. Print it and use it during your build.
Pickleball Court Construction FAQs
Do I need a permit to build a pickleball court?
Most cities require a building permit for a permanent court. Always check with your local building department.
What’s the best base for a pickleball court?
Concrete offers the most durability. Asphalt is softer on joints. Modular tiles over gravel are best for DIY.
How thick should a concrete slab be?
A 4‑inch thick slab is standard; 5 inches in areas with freezing winters.
Can I build a pickleball court on an existing concrete driveway?
Yes, if the slab is in good condition and large enough. You can apply acrylic coating and paint lines directly. If you’d rather find an existing court instead of building, check out our find pickleball courts near you guide.
How much does pickleball court construction cost?
Expect $15,000–$50,000 for a professionally installed court. A DIY tile court can cost as little as $5,000.
How long does construction take?
8–12 weeks for a full concrete court. A tile court can be installed in a weekend.
What kind of lighting is needed?
LED floodlights on 18–24 foot poles provide the best visibility. Electrical work must be done by a pro.
How do I maintain a pickleball court?
Sweep weekly, repair cracks promptly, repaint lines every 1–2 years, and keep drainage clear.
You’re Ready to Build
That backyard disaster taught me more than any manual ever could. Since then, I’ve walked dozens of properties with contractors, checked slope with a laser level, and flagged punch‑list items that would have become expensive problems. I’ve seen a well‑built court become the heart of a neighborhood — the place where kids learn to dink, seniors stay active, and weekend barbecues end with a friendly game under the lights. I’ve also seen rushed jobs that had to be resurfaced before the first anniversary party.
Everything in this guide — the base comparison, the drainage slope, the contractor questions, the final walkthrough checklist — comes from real‑world testing and mistakes that I won’t let you repeat. I update this article whenever USA Pickleball releases new construction recommendations, and I stand behind every table and timeline. Good pickleball court construction isn’t just about concrete; it’s about peace of mind.
The right court isn’t just a rectangle of concrete; it’s an investment in years of health, laughter, and community. Finally, bookmark this guide, download the construction checklist, and work through each phase methodically. Whether you’re hiring a crew or doing it yourself, you now have the exact playbook.
Now grab your plans, break ground with confidence, and build the court you’ve been dreaming of.
👉 Download the free construction checklist
When you’re ready for more, read our Pickleball Courts: The Ultimate Guide or test your skill with the Free Skill Analyzer.
